Showing posts with label Artsy Team. Show all posts

Our very own artsy backgrounds

Posted by Princess Eva Angelica On 3:19 PM 0 comments
You can make your own backgrounds in very many ways. What to use? Whatever that's on your hand or should I say what's on your desk?

Today we've used distress in different variations, stains, refills and pads! Color wash, pearl ex, perfect pearl, rub n buff, hot glue, different medium, stencils. Anything you can (or can't) think of. And of course stamps, lots of stamps. Maybe you'll think of a way of combining them in a different way than we did.

Background made with lace, gel medium, gesso, distress, pearl ex, iridescent medium and twinklings H2O. Paper sprayed with distress and pearl ex. The text says - equal parts dark and light chocolate makes a balanced diet.

Background made with acrylic paint, hot glue and pearl ex.
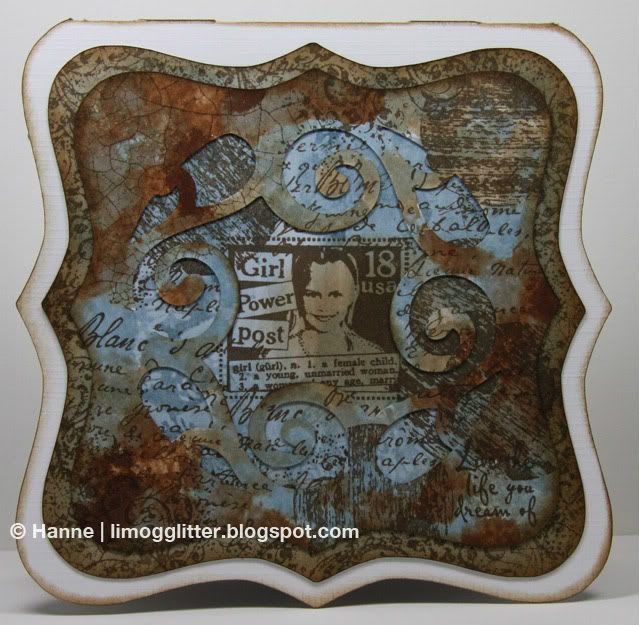
Cut out frame and panels with Cricut. Put on colours with distress stain and then stamped.

I used different tapes and wall paper directly on a tag. Painted with Lumiere. Stamped swirls and drew along the edge with black and white pen. Metal stencil, fiber paste and Lumiere was used to make the pattern.

Background made ​​of modeling paste through a stencil and sprayed with purple color wash. Skull is air dried clay and wings are a metallic butterfly. Accents are rub n buff.

Tag made ​​of alcohol ink (steam, swimming pool, silver and juniper) and stamped with silver and black ink. Digistamp is colored with copic markers.

Made with color wash, water, distress, stencil and stamps. Chocolate surprise inside the tag.

Background made with color wash, perfect pearls mist, water, stencil and stamps.

White cardstock stamped with stamps from Tim Holtz, embossing and distress pads was used.

Distress pads.

And as always. If you have any questions, feel free to ask us what you want to know! Check out our blogs for more details. Have you made your very own artsy backgrounds? Share it with us!

Metal leaf the Artsy way and DT welcome!

Posted by Princess Eva Angelica On 2:59 PM 0 comments
I dagens artikel visar vi hur man kan använda bladmetall på olika sätt. Detta vackra men ack så flyende material. Bladmetall är namnet på äkta metall som hamrats ut väldigt tunt. De vanligaste sorterna guld, silver och även koppar har vi nog alla sett men det finns även i tenn och aluminium. Denna form går även att äta då det går rakt genom kroppen utan att tas upp. En liten fin pralin dekorerad med bladguld är så fin att man knappt vågar äta den.

Slagmetall kallas den icke ädla formen och är legerad av zink och koppar. Förutom de vanligaste metallfärgerna finns den även i variegated som är en brokig, flerfärgad variant i exempelvis röda, gröna eller blå toner.

Vanligtvis förekommer de som väldigt tunna blad men de finns även som flingor som dels är enfärgade och dels vackert flerfärgade.

För att fästa slagmetallen finns flera möjligheter. Det lättaste tycker jag är att använda dubbelhäftande tejp eller dubbelhäftande limark. Men du kan även använda sprejlim, limstämpeldyna, sticky embossing powder som blir klibbigt när du värmer upp det samt olika lim som är ägnade åt det såsom duo embellishing adhesive.

The Artsy team article today is about metal leaf. Metal leaf, also known as composition leaf is a really thin foil made of real metal. Gold is commonly known but we also have silver, copper, brass and aluminium. This is eadible since it passes through the body without uptake. This way, we can enjoy a beuatiful chocolate piece with some gold decoration!

Imitation leaf is what the name inclines - an imitation, not made from the expensive material, but rather a alloy (mixture) of zinc and copper. Variegated is the name of a mixture of colours in red, blue or green.

We find them as very thin sheets of metal but also as metal flakes.

To fasten the metal leaf I find the easiest way is to use double sided tape. But there are lots of other products, spray glue, glue pad, sticky embossing powder of one of all the glues made for this work such as duo embellishing adhesive.

Enough said about that. We have had a DT-call and we would like to welcome our two new members to the Artsy team. To be fair, we picked one from Norway and one from Sweden!
We look forward to see a lot of their artworks and we are excited to have them on our team!


New members to our ARTsy team!
Welcome to Hanne and BellaMio!

Hanne's blog

Hanne from Norway is more known as limogglitter and this is what she tells about herself:

My name is Hanne. I started to make cards in 2004. I love to make my own backgrounds on my cards. Looking forward to be a parta of Team Artsy.

Jeg heter Hanne og har laget kort siden 2004. Liker godt å lage egne bakgrunner på kortene mine. Gleder meg till å være med i Artsy Team!


An equally warm welcome to Maria, Bellamio that also tells a little about herself:
Hej allihopa!
Jag heter Maria men kallar mig oftast BellaMio på olika forum. Jag är mamma till 3, sambo med 1 och matte till en kissemisse. Jag har pysslat med denna underbara hobby i drygt 7 år nu och älskar varje sekund av det!!! Min favorit är att göra själv! Tycker om att skapa egna papper, dekorationer, blommor m.m. Jag älskar att prova nya saker, så fort det kommer nya medium, mallar, stämplar m.m så vill jag köpa och prova! Jag är så otroligt glad över att få vara med i detta härliga ARTistiska team och jag hoppas att jag ska kunna inspirera er.Länk
My name is Maria but I often go by the name BellaMio on forum. I am the mother of three, partner of one and owner of one kitty. I've been doing this wonderful craft for more than 7 years know and I love every second of it! My favourite is to make my own...I like creating my own papers, decorations, flowers and so on. I love trying new stuff. As soon as new medium, stencils and stamps comes on the market - I want to buy and try! I am so happy to be in this ARTistic team and I hope I'll be able to inspire you.

White cs, embossed coloured and punched borders. Spray glue and drizzled on gold flakes.

Gold flakes on the edges. Coloured with distress, embossed and stamped.
Gel medium on cardboard and stamped when wet. Left to dry, put on Lumiere and silver leaf. Stencil and fiber paste is used to make the swirl.

Old wrinkled note paper glued to cardboard. Distress ink, gold metal and Inka Gold.

Lizard made of polymer clay and covered with gold leaf. Background with distress and colour wash spray. Leaves from old plastic plant.

Decopauge background colored with acrylic paint. Black rub ons, flowers painted with gold leaf.

Background with distress stains water, stamps and glimmer mist. Metal leaf on tape, rubon and on the edge of the picture.

Serendipity background with distress and acrylic paint dry embossed. Gold leaf. Bead made with fimo clay and gold leaf.

Background with candy wrappers. Brads made with fimo clay and gold leaf, alco ink and gloss.

Hope this have been an inspiration to you and don't forget to show us what you have done, we really would like to see your creations. And maybe you have found yet another way to use metal leaf or metal flakes! In the next few days we will post our cards in our own blogs and tell a bit more about them so check them out. If you have any questions we are happy to answer them!

We have a new ARTst TEAMMEMBER

Posted by Princess Eva Angelica On 4:04 PM 0 comments
During Christmas we have had a DT call for the ARTsy team, and we hereby proudly announce the first new member of the ARTsy team...

Vi har hatt en DT call i juleferien, og vi ønsker med dette å presentere vårt første nye medlem på ARTsy teamet...

Velkommen til Mikaela
bedre kjent som Totoro med bloggen
Pysselterapi & Livsglädje

Dette sier Mikaela om seg selv...

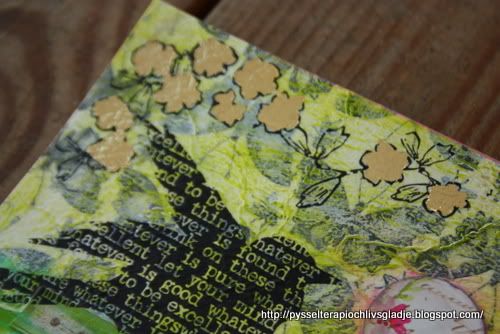
Mikaela is my name but I usually call myself Totoro in different forums. I love art, mixed media, polymer clay and metal. My husband calls my art dark, and I don’t have a better word for it. I love when the art tells a story or has a meaning. So today I want to show you something I’m really trying to learn. Self-knowledge. I prefer that word before Self- esteem because Self-knowledge is all about knowing who you are and what you are able to accomplish. I love to mix the deeper thoughts of artjournaling with cardmaking.

So when I’m not making art I’m taking care of my two beautiful children, 2 and 4 years old. They do inspire my messy art and the love to mix colors and paint.

Mikaela är mitt namn, men jag brukar kalla mig Totoro i olika forum. Jag älskar konst, mixed media, fimolera och metall. Min man kallar min konst mörkt, och jag har inget annat bättre ord för det. Jag älskar när konsten berättar en historia eller har en mening. Så idag vill jag visa er något som jag verkligen försöker att lära sig.självkänsla. Jag föredrar det ordet före självförtroende eftersom självkänsla handlar om att veta vem jag är och vad jag kan åstadkomma. Jag älskar att blanda djupare tankar från artjournaling tillsammans med korttillverkning.

Så när jag inte gör konst tar jag hand om mina två vackra barn, 2 och 4 år gamla. De inspirerar mig till kladdigare konst och väcker önskan att blanda färger och måla.

Her er noen av kunstverkene hennes...

Bunny - is almost the same as last but where I used the gloss medium throu a stensil instead to stamp in it. The lovely girl is painted with copics. Then I did a little skull of polymer clay. (a beautiful art must have skulls in my opinion).

Bloom - I painted the background with distress ink and stamps inked with black. After that I spread a layer of gloss medium and stamped with a lagre background stamp. Then I highlighted the structure with metallic wax. The flower is one part of an emboss metal tape flower,some parts from an old plastic flower and a little face of polymer clay.


Bee - This is a play with water-based crayons and markers.

We look forward to see a lot of her artworks, and are SO happy to have her on our team! Vi gleder oss til mange kunstverk fra henne fremover, og vi er utrolig glad for å ha henne på vårt team!

Velkommen Mikaela / Welcome Mikaela

A small reminder on the DT call!

Posted by Princess Eva Angelica On 10:58 AM 0 comments
This is a small reminder for our readers on the

ARTSY DT CALL

Do you have an eye for the ARTSY style?
Do you make your own backgrounds?
Do you have a passion for paint, inks and other mediums?

If you do, please send us a application for a spot on the ARTsy team.
Please send the application to artsyteam@gmail.com.

We need you on our team!

Connie's Day of Fun - A Christmas Zentangle!

Posted by Princess Eva Angelica On 8:21 AM 0 comments
I can not hide the fact that I had a difficult time to find out what I wanted to do on my day of fun this year. Not because I didn't find anything to make, but because I had to much things I wanted to do :-)

Made tags, Christmas vintage cards and some other projects, but my choice felt on a Christmas Zentangle with a Christmas stamp as motive...

So, I found my Moleskine book, my pens and rest of my gear and started drawing...


And, here's the result...


Hope you like my version of a Christmas Zentangle, and I also wish everybody a Merry Christmas & A Happy New Year.

Inger's day of fun!

Posted by Princess Eva Angelica On 3:13 PM 0 comments
Today it's my day of fun and I, Inger, would like to continue one of my favourite themes, recycling. This time I'm focusing on tissue paper and I have a tutorial for you!

This is most of the stuff I've used. I seldom seem to be able to take a before picture with all things, I always make it up as I go along. If I'm not pleased with the outcome, I add something else.
  • gel medium (I used semi-gloss)
  • glazing medium
  • matte acrylic paint (MM)
  • lumiere acrylic paint
  • book paper
  • music notes
  • old stamps and paper from the post office (roughly 40 years old)
  • tissue paper
  • stencils
  • punchinella (sequin waste)

When I came up with this technique I only used music papers and book pages. I liked that look a lot.

Brush on gel medium, put the scraps on the paper and brush on some additional gel medium to make sure its stuck. The coverage depends on how much you want the text to show through. You don't have to add this much! It takes some time!

Tissue time. I added a lot of tissue, next time I'll add a little less! The less tissue I add, the more text shines through which I like.

Time for next step which is colouring the whole thing! I grabbed some green colours and some purple for contrast. The glazing medium is important. It's mixed with the acrylic paint and makes it transparent. Without that the paint would be opaque and you would not see any of the papers underneath.

I wasn't happy with the outcome so I added some Lumiere, metallic rust. Much better!

I want a lot of texture. I used gel medium over stencils and punchinella to give me that. Let it dry. A tip to speed up the drying time is to put it on a radiator, although not an electrical one!

Drying...

Dried!

Now I want to accentuate the texture and I choose copper to do that. I put it on my fingers and brush it on the paper. You can also use metallic rubons, lumiere or rub n buff.

Highlighted. I painted the snow flakes with hi lite red, lumiere, a wonderful colour.

Some close ups. Can you see the snow flakes and the holes from the punchinella?


And what did I make of this background? Well, some christmas cards of course. Maybe it's not the most typical colours for christmas but I always like to twist things around.

I really like this green colour so I wanted the cardstock to show. The candle is stamped on transparent paper, I added double sided tape on the backside and "painted" it with pearl ex powder. Sparkly fantasy fibers.

The baubles are stamped on alco ink coloured glossy paper and cut out. I cut off the hang thing and added a cord instead. Punched out shrink plastic and stamped merry christmas in Swedish. I put down some tulle and heated with the heat gun to get some effects and holes.

I punched out holes and filled them with bees wax and mini beads. I put a stencil over the cardstock and sprayed it with pearl ex. Outlined with use of another stencil with a pen. Twisted some yarn around the swirl.

Rudolph looks a bit sad. Shouldn't he be happy with that gorgeous red flower soft on his nose? I punched out a swirl and with inspiration from Tim Holtz christmas tags, I filled the hole with sepia accent. Rudolph is stamped and embossed on a book page and painted with twinkings H2O. Shrink plastic, coloured with fluid chalk. Bandage coloured with distress ink. Flowers sprayed with a mixture of gum arabic, pearl ex and water. The sparkly thing is fantasy fiber.